Did you know?

A "Pandula" is a flower which blooms only in one's imagination.

Pages

Friday, July 29, 2011

Update on projects.

July 7, 2011

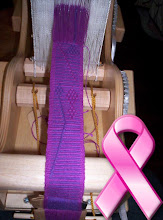
First you see my new lace weight spindle.  I am spinning this commercially prepared cotton roving, (I can't remember where I got it as I have had it for years) and it is indeed turning out to be my best spun cotton to date.  Either I am getting the hang of it or the roving is better, or maybe it is the little spindle.  Maybe all of the above.  But this is what I have for Tour de Fleece right now.  Remember I already finished the wool/silk on the phang last couple of days.


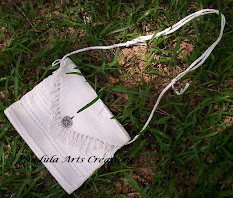
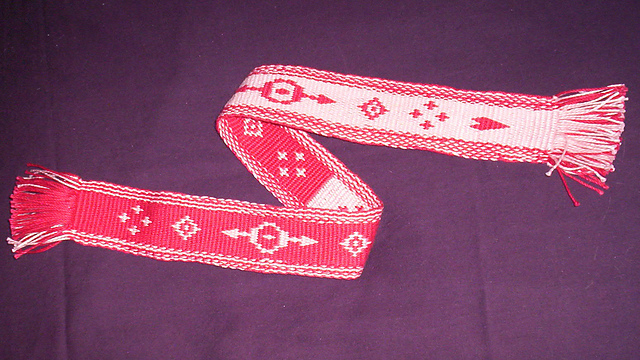
Since I couldn't turn the bands into a poncho as I originally planned, if you remember they were too heavy, I have decided to develop a tote out of them.  I really love the Tibetan bag, also known as Doni Delis bag. The one you see if you click is made of re-purposed commercial fabric.

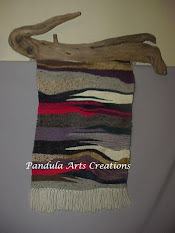
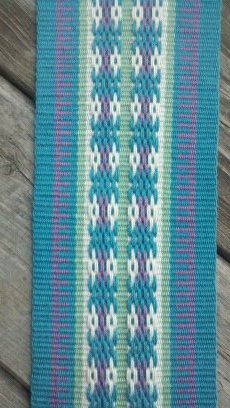
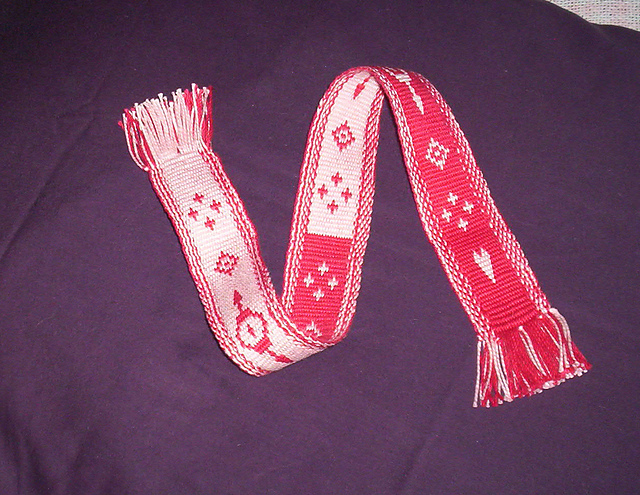
The first bands I chose just wouldn't come together in a design that Dana (she will be doing the assembly) and I liked.  So I played around with some of the others and came up with something I really liked.  Below you see the piece that will be used for the closure flap and some interior pockets.  This also gives you an idea of the color scheme.  Can't wait to see the end result.  She picked out some batik fabric for the lining that I will get to see in class tonight.  Stay tuned to see the completed bag...soon I hope!


Tonight Dana wants to learn Double weave on the backstrap.  I gotta go wind the warp!  TTYL

Wednesday, July 27, 2011

I've been a very busy little girl!

July 5, 2011

I sat down and made 6 envelope pouch's out of my warp face bands, some were done on a Gilmore Wave, some on a backstrap.  I am ahead of the game when I need to give a gift!


This is the first batch.  the black and white one is my first pebble weave piece.  It was done on a backstrap using a circular warp and is on it's way to Las Vegas, Nevada to my daughter for a birthday gift.

The teal and brown piece was my first 'simple warp float' piece on the backstrap...I disliked this piece from the start, but my friend Carol wanted it.  Yesterday she said to me "I think I will make a pouch out of this for my cell phone accessories."  My response? "Well, I just happen to be getting out my sewing machine this evening anyway, so allow me."  I love the end result.  I especially like the buttons.  My friend Dana's fella sliced a tree limb for me and drilled holes to make them into buttons.  Very rustic, I sanded them a little and orange oiled them for good measure.  I like the way the orange oil made the wood grain show up more.  

The warp teal and bridal white piece with the Greek Key design, I am keeping for myself.  I absolutely love it!  My sewing skills are coming right along.  Thanks you Dana, for encouraging me to sew.


I really gotta work on getting my signature hearts to be right side up. :-(


The little red and white one works great for female...well you know...stuff!  It was the first successful double weft double weave.  The other two, they both started out as double weave.  I still hadn't yet gotten the hang of it yet and when I failed, I simply plain wove the double stranded warp.  It was a way to keep from throwing out the warp, and I think they even made pretty good little pouch's!

Just about the right size for important papers, or make up in your purse.  These three don't have homes yet, but will probably be gifted out to some of the folks who help me with my coming move.  shhhhhh!


And then I plied the wool/silk roving.
For "Tour de Fleece".


Dana is making a scarf out of her own hand spun wool and this isn't really enough for me to do anything with, so I gifted it to her to trim out the scarf with.  Or whatever else she can come up with.


Monday, July 25, 2011

My second 'pebble weave'!

July 1, 2011

I tried all kind of new skills today.  I warped a circular warp on my new warp board.  That little board works like a charm.  I used a new method of lease sticks, also worked like a charm.  I made three sheds, one plain weave, pebble one and then pebble 2.  I only had one tiny mistake...two crossed warps in the same shed, fairly easy to fix compared to redoing the entire shed system.  And here are the results.

Here is the new warp board with my circular warp on it.  Please notice how straight the pegs/bolts are.  Absolutely no leaning (which means consistent tension)!  I warp tight too, so this is a wonderful wonderful thing!


Here you get to see my new 'lease sticks'.  The metal rings make this so much easier than tying bow's with string.  Less waste also.  Another plus.  These are just shuttles that I made years and years ago from Home Depot paint sticks.  Free is good too.


Here you see that I am all warped up and ready to go.  The lease sticks are now on their side and tied to one another.  This keeps my plain shed wide open, very easy to get the sword inside.  You also see string heddles on pebble shed one and pebble shed two. 

I am tied onto the dresser, but once I am off and running my feet will brace the stick that the blue band is tied to.  This is why I did the circular warp.  It is actually twice as long as what you can see on the top.  Now, when I have woven as far as I can reach, I will rotate the warp around so that I can weave some more.  So I never have to roll up the woven part closest to me.  This way when I want to I can brace the furthest bar with my feet and the warp never changes length.  It just rotates around the bars.  This makes me part of the loom and self sufficient.  I won't need to try out what to tie up to a sturdy fixed object (it needs to very strong for those who are not aware), which can be difficult to find at times.


Here you get to see my nice clean shed! 


Here you get to see the 'Pebbles'!  My head is gonna bust I am so excited.


Friday, July 22, 2011

Portable, collapsible warping board!

June 28, 2011

I made myself a portable warp board today.  I haven't used it yet, but I think it will work.  The four boards have holes their entire length and are infinitely adjustable.  The drinking straws are for protecting the yarn from the threads on the bolts.  The short bolts are only for stability.  When finished winding the warp...unscrew the bolts, take the 4 boards (which were cut to size) and they fit perfectly in the bottom of the tool box I will be carrying my weaving tools in.
 
I also got 2 more dowels cut so that I now have 3 full backstrap loom bars.  WoooHooo!  Got some small c clamps for holding the warp board steady and hooking up the loom as well.  When necessary.  

I am working hard at making my art very portable in preparing for the impending move.


Foot note:

For my portable warp board I bought bolts/screws that could be counter sunk into the wood.  Then instead of counter sinking them, I put a washer on both sides of the wood.  Then the screw goes right up into the washer closest to the wood and REALLY stabilizes it.  I also made sure that the guy at Home Depot who put the holes into the wood did not make the holes very much larger than the screw.  They fit kind of snug (no wallering around), also helping to avoid the leaning.  Each of the boards were stacked on top of each other so that all of the holes lined up as well as possible.  

Yesterday I did take a dremel and make the holes slightly larger as I was having trouble getting the screws in and out easily.  Basically I used a sanding bit and just smoothed the inside of the hole, making it every so slightly larger and less likely to catch on the sides of the screw as it goes through the hole.  

I have used it a couple of time so far and I am happy to report that it works like a charm.
I tend to wind very tight so I am very pleased that the bolts don’t lean. Especially since with backstrap weaving the warp is one long continuous thread. You don’t cut and tie on, which means if there is a loose spot the warp is basically unusable, unless you want to fight with it the entire time. I have ruined alot of warps trying to learn this consistency of tension. Fortunately I have learned to spot it before I put it onto the loom bars and I can just unwind it and rewind it. Lately it has been going better. I have found that one of the things that helped me was to stop switching back and forth between different looms. Now that I am mostly sticking to the backstrap, my skills are improving.


Wednesday, July 20, 2011

More Warp Floats Galore.

 June 27, 2011

TADA!  My second warp floats galore.  The hook design Laverne did last week in black and white is definitely on the list!  And I did it on the backstrap!  Woohoo!  The warp is 3 ft. and I still have plenty to do, but going more narrow seems to be helping!  No more stripes if I don't want them. Odd how I figured it out after the stripes stopped bothering me.  It isn't free form but it is what I wanted it to be at that moment...and a struggle to get there!


FYI to all of my wonderful followers...I am in the process of a move back to FL...starting tomorrow morning as you are reading this.  I hope that I have enough posts to keep you happy until I can get back on line.  I will miss you all and be back as soon as possible.  Can't wait to see the Ocean!

Tuesday, July 19, 2011

Another attempt at Warp Floats Galore!

June 26, 2011   AND I NAILED IT!

I decided to give this another shot since Dana smoked me with it on her 3rd backstrap warp!  LOL

I used left over partial skeins of red, white and blue.  Used a backstrap loom, and had plenty of problems with the warp.

But I got it.  I hid the stripes with spots, or as the "Helen Bress" book "Inkle Weaving" calls it a speckled background...although I am not sure it is the same technique at all.

Just in time for forth of July!  Not my best work...but I can live with it!


Monday, July 18, 2011

Dana and Marsha's collaboration! A messenger bag!

July 17, 2011

My handwoven bands, Doni Delis bag/Tibetan bag as a starting point...Dana's choice of batik fabric and wonderful sewing skills.  I am going to be so proud to carry this wherever I go. 

It goes over one shoulder and hangs in the front of me.  The blue and yellow you see on the inside is another one of my weavings.  It is partitioned into pockets, glasses, sunglasses, cellphone and ink pen slot.  It measures 14 in. wide and 10 in. deep.  I chose the brass zipper and the little woman that you see on the inside of the strap is also a pocket, my keys will probably end up in there.


Friday, July 15, 2011

Crystal's Birthday and some new backstrap tools.

7/15/2011

Today my baby turns 29!  How did that happen?  I was just 29 myself.  Happy birthday Pistal!  Here favorite color is Eggplant purple...thus the purple font!  LOL

I sent her a little envelope pouch for a little surprise.  She is in Nevada and I am hating not seeing her on her birthday.

Hers is the little black and white one on the left.  My very first pebble weave piece.  She already has it and says she is using it for her sunglasses!  I love that!


I have been making a few new weaving tools of late, getting ready for the big move back to FL.  Trying to make everything more portable.  I even gifted and sold a couple of these on Ravelry!  

They are just hardware lumber, but I shape them by hand all by myself.  

If anyone needs any feel free to contact me via the blog!  I sell them for $1.00 an inch.  So a 10 in. sword costs $10.00 PLUS shipping and handling!

This one is brand new.  I will give it a swipe with orange oil to make that beautiful wood grain show up nicely.


The top one is made from a Home Depot paint stick, as are many of my tools.  The middle piece has been with me for many years.  I couldn't believe how much grime came off of it when I sanded it.  It did take off most of the pretty golden color when I sanded it though.  It is made from Lattice from Home Depot, just like the new one.

Here you see my new backstrap bars.  They are Oak and  all grooved on the ends (with a dremel), sanded and lightly oiled.  Aren't they pretty!


Dana's newest piece...and a few random thoughts! (rough draft)

June 24, 2011

Dana conquered 'warp floats galore'!  I still haven't figured this one out.  So I guess at this point the student has indeed surpassed the teacher. She even did it on a backstrap loom.  I am so envious of her natural talent for this type of weaving!  Job well done Dana!


Here you see the hand carved spindle one of the ladies on Ravelry gifted me.  This is the same lady who gifted me the Turkish spindle months ago.  She also sent me this gorgeous wool/silk blend roving!    So many gifted and generous people on Ravelry.

It is fashioned after a 'Phang' spindle.  I believe the shaft is Cypress, but get this, the whorl (dark circular piece) is made of Spruce bark!   Man I wish I were not so dangerous with a knife.  I would try this myself.


For now I will just have to be satisfied with sand paper and making my own swords, shuttles and backstrap loom bars.  Eventually I intend to make myself a set out of Oak that I cut from the tree myself.


Here you see my solution to an expensive warp board.  I bought five so I can create my cross, even when separating out the stripe colors for warp floats.  The fifth one is for turning a corner if I want to make a longer warp.  These are called bar clamps and I can clip them to most anything, thus creating warp posts.  I bought 5 for $6.98 a piece at the local Home Depot store.  I kept the receipt just in case I don't like doing it this way.  See I am accustomed to the posts being horizontal, like on a warp board.  These being vertical will take a little getting used to for sure.  The bars are 12 in. long so that if I have to clip to something thick, I still have plenty of post to warp on.

The little table they are clipped to was a $5.00 find at the local thrift store.  Being home made and unfinished it has made a fabulous care free work table that also folds up when not in use. 


Thursday, July 14, 2011

A strap for Dana!

July 13, 2011

I started this warp with only one thing in mind.  A SUCCESSFUL warp.  I was having a dry spell with my creativity AND my warping.  It was supposed to be plain double weave, but I turned it into another double weft double weave piece.  FIVE feet of it.  I am very tired of blue and brown. LOL

In talking to my friend, Dana, I discovered that she needed a strap so she could tie up to various places to do her backstrap weaving.  Mostly to the door knob of her closet.  So I decided to make her one.    Tying up to a door knob is kind of tricky, you need the piece to tie on where it won't slip off when you pull back on the warp with your body.  You also need a way to tie it up to the loom bars themselves.  For those of you who don't know, you really need to do a wider piece to keep it from flipping and flopping around.  Or if you are doing a narrow piece you can use a shorter loom bar at the far end where you use the strap to tie up to the door knob.  

I have not learned how to weave a piece end to end with no waste and no fringe.  You see it is very tough to do this, you eventually end up needle weaving because your shed space is so small at the end.  This also has to do with the fact that I am no longer scared to death of using my sewing machine to hem them.  Not knowing what I was going to do with the strap I really didn't leave enough fringe at the start to use for ties, like I do with my own strap,  The strap is also shorter than mine, so I had to be innovative to make it work.

Here is what I came up with.  After I tied the knot it was even shorter :-(, bummer.  So I braided a 12 ft. long tie and added length to it that way.  I haven't given it to her yet, but hopefully at class we will try it out.  Modifications may have to be made.  

Myself I use c clamps on my dresser to tie up, so I am not sure how it will work.  There are no doorknobs conducive to backstrap weaving in my room.

Here are a few pictures.  I will let you know how it works when she tries it out.


Wednesday, July 13, 2011

Fooling around with designs on the backstrap loom.

June 20, 2011

I have been so totally stressed that I haven't been able to tap into my creativity at all.  I keep going around and around in circles.  So I just got out the narrow warp that is already on the backstrap loom and with nothing in  particular in mind, started weaving.

I have absolutely no need of another long narrow band, but it is already on the loom and I didn't want to cut it off and waste it.  Everything I try to warp up turns to mud.  So this is what I have going on at the moment.

This band is actually coming along nicely...I am into the last foot or so of it.  


I will be gifting it to my friend Dana so she can use it to tie up to a door knot when she wants to backstrap weave inside the house.

Monday, July 11, 2011

Success with a Backstrap!

June 12, 2011

So I am finally having success with the backstrap...sort of.  As usual I was just happy to get it warped somewhat successfully.  Reasonable tension and length.  Didn't even count the warp...let alone have a design plan.

So far all I have is my mark...for the second time. 

It is 5 ft. long, 56 warp ends, 1 3/4 in. wide.  Didn't even think to take a photo of the back side.  :-(  Especially after having to unweave the effort down to the first 4 rows. 

You know the OCD is kicking in when you can't sleep ( all night I might add ) because all you can think about is ... now that it is warped what design do I want to do?  LOL

IGNORE THE OLD LADY LEGS!


I am really just playing around with this one.  It is boring me to tears and so I have even started other projects with other backstrap looms.

Stay tuned for 'warp floats galore'.

Friday, July 8, 2011

New to me Cricket Rigid Heddle loom.

 June 10th
 
A couple of wonderful ladies on Ravelry gifted me a cricket loom.  One of them had taken a saw to it and made some um...modifications.  I assembled, sanded and oiled it, then decided to see if I could use it for my warp face weaving's.  ( I sold the Mini Wave as I have definitely outgrown it.)  


This will allow me to go wider without having to spend alot of money I don't have.  Thanks so much ladies!  You know who you are.

This warp fought me all the way to the end. For some reason I have had multiple bad starts with one weft double weave. I think it has something to do with the fact that I would a figure eight on stakes (c clamps in this case) instead of using a warp board…somehow I kept having one shed totally floating on the backside. 

Weird, right, it’s not like I don’t know how to do double weave. 

So I took it off the backstrap and mounted it onto the new to me Cricket rigid heddle loo. Without the heddle of course. Just used it as a frame like many of you have done. It was definitely a practice piece…the first on the cricket. It measures 1 3/4 in wide and the woven web is 10 and 1/2 in long. I find I am really drawn to the Bedouin designs of late. When I couldn’t get the double weave to cooperate I switched over to double weft double weave and just left the edge warps doubled. Thus the speckled sides. It has absolutely no purpose yet…I tried to use it as a collar for Lacy, but she said it was too wide and too long. eh It is what it is. I am just glad to be back weaving a little bit.
image title
image title
image title
I have a narrow brown, baby blue and teal piece on the backstrap…since my creative juices have stopped flowing I think that is my next piece to try to complete. We’ll see. Wish me luck!