Did you know?

A "Pandula" is a flower which blooms only in one's imagination.

Pages

Showing posts with label instructions. Show all posts

Wednesday, February 29, 2012

Pine needle basket weaving/coiling.

January 18, 2012

I thought I would just throw out some of my experience's on the learning curve of Pine needle basket weaving.

One of the things I think needs clarification is the name "Pine Needle Basket Weaving".  Notice how I always place the word 'coiling' after 'weaving', the reason for this is that there is no actual WEAVING going on here.  I can't even imagine how it got that name.  

In reality it is coiling and stitching, more akin to sewing than anything else...maybe embroidery and cross stitch as the stitches are decorative. This is why I always differentiate this title.  I have only seen one book that clarifies that this is not weaving, there is no over and under, only stitching and feeding more pine needles into the coil.  The method is actually very simplistic, the rest is all design element.  That is why the resulting basket is so very personally related to the person constructing it.  This is also in all probability why I love it so very much.

The tools are minimal, and are usually already on hand, especially if you are artsie fartsie (crafty) at all.

You need pine needles (I collect them myself and use rubber bands to bundle them with all of the heads at the same end), of course, a needle, and thread (or even raffia)at a minimum.  Some people dampen the pine needles to start with, and then wrap them in a towel to keep them moist.  A couple of times mine molded, and so I don't dampen them any more.  I us center's for most of my baskets that are large enough that I don't need the pine needle to bend to the point that it cracks or breaks.  I also find that I get a firmer basket if I use them dry.

I also use a gauge (a piece of cut ink pen tube, sometimes a piece of a drinking straw), a pin cushion, a small pair of pliers, scissors, wax or thread heaven, something for trash, a container for my tools  (glad ware, wicker basket or tool box even), a container for the pine needles (glad-ware again), a thimble (I keep a medal one and leather one on hand), a glove for my right hand (Playtex cleaning glove with the fingers cut off at the tip, when tightening up the stitches it is easy to cut yourself, like a paper cut, with the thread without this glove) .

So here are a few pictures to help clarify.

First off, my friend Dana sent me some Long Leaf Pine needles from Georgia.  I knew the ones I have found here in FL so far were smaller but ... OMG.  Check it out.  Not only are they longer but the difference in thickness is incredible.  The Long Leaf are heavier, say a #3 crochet thread size, and the ones I gather here are more like a #10 thread size.  Amazing.

They both work equally well, I just have to feed more pine needles in more often with the smaller ones.  Mine are somewhere between 8 to 10 in long, and the Long leaf between 14 and 16 in. long.  God love Dana for send them, and I hope to receive more.  They are expensive to buy by the way.


So here I will post a pic of some of my tools.  This is part of the left hand glove that would have been discarded.  This way I don't waste it and I can double up on thickness.  These are the fingers that get the most cuts from the threads.

This is the second layer of glove.


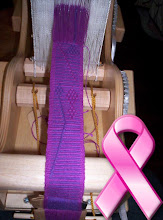
Home made pin cushion (steel wool wrapped with burlap in an old cheese tin), plyers, wax, thimble, scissors, #10 thread (I double it because it breaks when I don't) and a started basket.  Notice the gauge and the sliced Poplar center.  I had a friend cut and drill these for me months ago so that they could cure.  I don't care for the poplar as I see no grain, live and learn.


Glad-ware with de-capped needles ready to go.  Some were picked green and dried indoors to retain their green color.  Eventually they were brown up just as the others that were dried outside will do.  I think I recall reading that if you Shellac or varnish the basket they colors stays green...but I like the Pine scent so the most I have done is spray a little matte fixative on a basket.  I find I like my method of waxing the thread and then melting it in the microwave is more to my liking.  Makes the house smell wonderful also.


I save and use tins alot.  The round one holds my rubber bands, one has needles, one has wax.  You get the idea.  And then we see the gauge at work, this one is an ink pen tube cut to size.


And that, my friends, is my way of making pine needle baskets.

I have taken to walking my dogs in the afternoons to scour out supplies, and low and behold yesterday I found a small stand of bamboo.  The lady who owns the property says have at it, so today I cut some small bamboo to work into this process.  I am also going to add in some palm frond and vines...so stay tuned.

Same bat time, same bat channel.

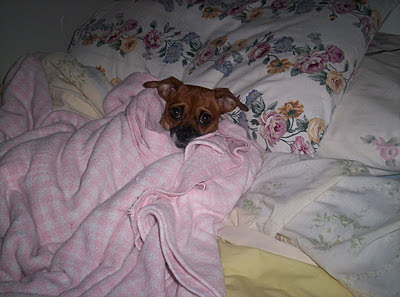
Oh yes, and we can't forget the cutest pup ever has to supervise.  She is on the heating pad AND under a blanket.  You would think we lived in the Arctic instead of FL.  lol


Monday, August 8, 2011

Finishing technique for warp face fabric.

July 26, 2011

This is a system that I devised myself on how I start and end a warp face weaving.  I have found that it won't come un-woven and can withstand storage or use until it can be sewn, or left just like it is.  It is certainly not the only way to do it, it is just my way to do it.  

I have been asked by alot of the ladies on Ravelry to explain with lots of pictures and since I did it for them, I figured I may as well post it here on my blog.  I hope it helps anyone who may be interested.

There is an explanation above each picture.  In other words when you read the explanation, please look at the picture below it.

In the first picture you see that I have passed my weft from right to left and left the tail hanging out.  The tail eventually gets cut off.  I then cut a piece of weft the size I want for the space I need to weave.  In this case I cut  around 24 in. as I want to end with 10 rows of each stripe color = 20 rows (sheds) total.  I always start and end with these 20 rows to get the width established at the beginning, and to make it the same, for design balance purposes at the end.  I then place the new weft into the same shed, with equal amounts hanging out of each side of the weaving.  Bring it down to the fell line and change sheds and beat the weft.

Then, take the right hand weft and pass it through the shed to the left.  For a moment you now have both wefts on the left hand side.


Then I take the one that was already on the left and pass it through the SAME shed to the right hand side.  Check my edges to make sure they are neat and my width is consistent, change sheds, beat.


Here you see the result.  Again a weft is sticking out of both sides of your woven web.  Now you repeat the process.


The right hand side goes through the shed to the left.


Then the weft on the left hand side goes over to the right hand side through the SAME shed.  Change sheds and beat, even if it is the last row I change sheds and beat, the weft stays put better until I can finish knotting that way.  I usually continue this for my 20 rows and leave enough weft hanging out either side long enough to make it the same length of the left-over warp.  This way it is the same length as the rest of the fringe and looks nice and even.  If I decide to twist, or braid there are no little short piece's that don't act like they should.  

If I decide to sew it into something else I just cut the fringe later while assembling the piece.


Now I go to one edge and separate the last two warps, one from each shed, and add my excess weft in with these two.  I cut them at the furthest point that I can and I then tie an overhand knot with all three at once.


I then go to the other side and repeat this.  I now have an overhand knot at each edge with two warps and one weft in it.  


Then on a band this narrow I would usually just take two warps from the very center point, one from each shed, and tie another overhand knot.  For demonstration purposes I have spaced them out like I would on a wider piece so you can see them.  

Then I take the piece off of whatever loom I am using, in this case the backstrap loom, and do the same knots on the other end.


Then I trim the fringe to be even on both ends.  I can actually leave the ends like this indefinitely without fear of unraveling.  If somehow one weft were to come out (and it won't because it is knotted) then there is still another one in the shed keeping the structure of the fabric stable.  It can actually withstand alot of use and I have never had one come undone finished out this way. I have even machine washed them and they hold up beautifully.  Of course as with all hand woven textiles I use the gentle cycle, and sometimes I even put them in a pillow case and tie a knot in the end to protect them as they wash.  But even without the pillow case they hold up very well.

I have found that since I use these pieces quite often to make little purses have a little more thickness at the beginning and the ending have been beneficial.  If it is thin, or loose it doesn't hold up well when making the closures.


So this is my technique, please feel free to use it and tell your friends if you think it will help them, where they can find this information.  

One last thing...alot of folks told me that this is an unnecessary waste of time as warp face weaving's don't un-weave.  HOGWASH!  If you use a smooth yarn, as most of us try to do in warp face weaving, they will indeed un-weave.  Ask me how I know.  Some indigenous weavers use things like wool, or alpaca, camel and such.  Some of these won't un-weave, depending how they are spun.  IF it is hairy/sticky it makes the weaving a true nightmare, so I never seem to complete the piece anyway so un-weaving is a moot point.  Opening a shed with hairy yarn is very difficult.  

The smooth yarns like the mercerized cotton yarns I favor, will indeed un-weave.  My thoughts on this are pretty simple, if I went to the trouble to hand weave a textile, I DON'T WANT TO RISK IT UN-WEAVING.  Better safe than sorry.

Just sayin'.