Did you know?

A "Pandula" is a flower which blooms only in one's imagination.

Pages

Friday, September 30, 2011

Plain weave double weave! Success at last! Well, sort of...


September 17, 2011

I finally figured out how to do plain wv dbl wv.  Love this crappy table I got off the side of the road.  It makes a great table to hook my loom up to.  Nice and heavy.

All I really did was the same thing I do with warp face weave and space the warps further apart.  I twined the bottom edges for spacing and used double stranded worsted weight yarns for the continuous heddles.  Works great so far.  Now to figure out the patterning.

I did alot of reading to figure this out!  Handwoven turned out to have a great article in their Jan/Feb 2011 on dbl wv bk marks that made it finally click.  However, I am not using 4 shaft/sheds I am picking and counting the same way I do for warp face dbl wv.  I will indeed develop the other two sets of heddles later on to see if I can make it even quicker.  I just felt like it was taking longer to set up than it would take to weave the piece anyway, so who needs two more sets of heddles.  If it was any faster it would defeat all of the prep work, kind of a let down to be finished so soon.

It is also just a practice piece with mystery yarn, so definitely alot of learning going on.


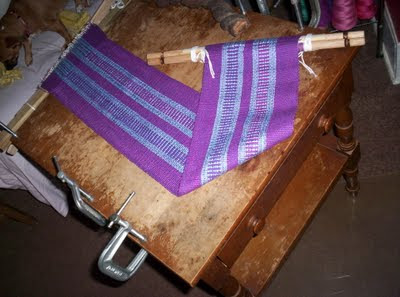
This just lets you see the table.


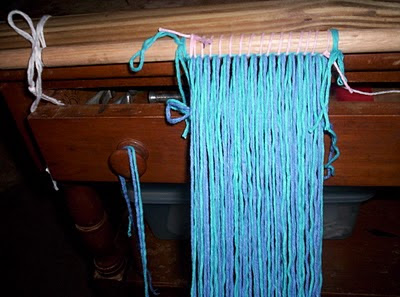
Here you see where I twined and lashed my warp to the bar.  I am trying to accomplish a 4 salvaged piece.  In other words no fringe.  As well as having interchangeable colors from back to front.


Of course Wiggles has to supervise.  See the little weaving...on the back the colors are reversed.  Notice how you can see the up and down threads (warp) and the side to side threads (weft)...not what I usually do.


The back side.


The front side.


And here I decided to switch the colors, now they opposite color is showing!


Update:  Later the same day...


Been working on this all day and I have learned some things if you guys are interested.
First off I was using the same dbl wv system Laverne taught us…stick shed and heddle shed with separating out each color as needed by picking. When I tried to do a pattern it was a dismal failure this way. Just couldn’t seem to get it to work. Soooo…back to the books.

I went ahead and put in 4 sets of continuous string heddles, per the draft (just learning to read these also, another new skill). Somehow I had trouble, couldn’t get it to work with the treadling sequence my books gave. So I persevered and figured out the sequence for putting which ever color I wanted on the top face. Maybe I threaded wrong for the sheds/shafts, but I did get it to work. Eventually.

When I replaced my original heddles and stick shed with the string heddles, I only used single worsted for the heddles…instead of double stranded worsted as I had in the start. I am now getting narrowing. I have unwoven several times and I can’t figure out if I am having problems because my heddles aren’t as thick and helping out with the spacing, or if you just get different tension in general with 4 sets of string heddles. Or if maybe I am just frustrated and tired. lol I did find that the tension was very different when I used string heddles on my few pebble weaves. so it might just be the nature of the beast.

Then I tried, per, the instructions to do a pattern. A simple diamond. Still can’t seem to get it. Weird. I am also finding that I horribly miss the clean lines of my warp face dbl wv…instead of the stepping on the edges of this weave. I know true Finnweave, which is not reversible, gives cleaner lines, but I am threaded for ldld (supposed to be more attractive on the back if not completely reversible), not llddlldd. So I am committed at this point, as I refuse to redo the heddles yet again. I am also finding that I prefer finger picking/counting to all of these fiddly string heddles (no offense Laverne, I know how you love using all of the heddles). Maybe I just like to more tactile feel of getting down in there with my fingers/hands. I am also thinking…that I may have more design freedom without all of these heddles…will have to keep at it to figure that one out.

So for now, my shoulders are screaming, and my brain is fried…but I am closer to achieving the goal than ever before. I can at least get double face plain weave, which by the way is very very near to balanced. More so in the part that is narrowing. In the first part I get 9wpi and 8ppi…in the part that narrowed I am getting 8x8.

So those are my thought on plain dbl wv up to this point. whew, tired…


September 18, 2011  Sunday


Well I got a diamond of sorts.  Unfortunately one side isn't closed/connected.  Hmmm, definitely not my best work.  But o.k. for a first attempt.  It also kept getting more and more narrow as well.  Better next time.


Wednesday, September 28, 2011

Plain weave wall hanging.

September 13, 2011

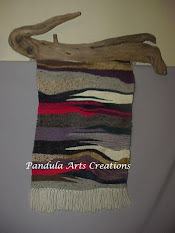
Who says plain weave has to be plain...I am thinking of making it into a wall hanging with the vine you also see in the pictures.

The table my backstrap loom is hooked to came off the side of the road...thus the crappy finish on top.  But it is substantially heavy and this allows me to weave on it comfortable.  It also has one drawer in the front.


The woven web is 32 in. long.

Monday, September 26, 2011

More completed projects!

September 7, 2011

Finished up Alissa's pencil pouch and Aye's purple peace sign envelope pouch.  I like them both.  I certainly hope they do!

The purple doesn't photograph well for some reason.  You just can see the bottom of the peace signs in this picture.


I hope some day I get better at figuring out how to get the motif's where they are ALL right side up and positioned where they are not folded.  Each time I get a little closer.


 Here we have the pencil pouch.  This is the side I am calling the front.


It opens with a drawstring and the sides fold down part of the way so she can reach anything small she wants to put in it.

Friday, September 23, 2011

Completed project!

September 6, 2011


I have completed (in one day believe it or not) my prototype, plain weave back-scrubber on the backstrap loom.  I learned alot.

Wow!  What a joy to open heddles that are far enough from each other that they don't stick to each other.  Wow!  This is a much, much gentler type of weaving.  Wow!  Talk about faster!  I will definitely be doing more of this as I have tons of yarns that are suitable for it.

Here we have the completed project.  28 in. long, without straps (including the one fringed end) from a 34 in. warp, and it is 5 in. wide.


If you look closely you can see where I got two stripes that tracked a little...kind of odd looking.  But remember, it is a practice piece.  Lots of learning going on here.


This end is gathered because that's what it wanted to do naturally.  I didn't do my knots properly at that beginning end of the warp wile winding onto the warp board (i.e. changing colors) and so I couldn't make a selvaged end there.  Next time I know what to do though.

All the way across I thought I had my purple thread on the right of the pink in my double threading...the tracking that you see is where it was accidently reversed...thus 2 pinks side by side and two purple's side by side.  Further down the piece it didn't do this...I guess the warp's got twisted while weaving without my noticing.


This is the twined edge.  I love this!  Because I was able to tie the ends of the twining on both outer edges in with the knot on the strap at either side (so that it doesn't slip around) it doesn't gather.


What a nice neat edge it makes!  Next I might even try and edging cord for the sides!


So this one is mine, with all of its little character flaws!  Stay tuned though, as I intend to perfect it!

Wednesday, September 21, 2011

Plain weave double weave...eventually!

September 5, 2011


SOoooooo…I just had to give it a try. There is a new Weave-A-Long on Ravelry, in the backstrap group.  It is for plain weave...be it warp face or plain weave.  In the beginning it didn't interest me as I am usually doing more design/warp floats than plain weave.  But I changed my mind and I guess I will be the one doing plain weave without a heddle/reed. 

I twined my warp for spacing, at both ends. I also doubled my worsted cotton to make my string heddles, hoping this would also help spacing. I got that idea from a fellow Ravelry member, she used a plastic bag cut into strips for heddles. I figure if they are ‘fat’ they will help with the spacing.


I originally warped up to try balance dbl wv…finnweave. But I decided as this is waste yarn (small balls left over from other projects), and I am new to this twining for spacing thing, and continuous string heddles are not my strong suit (normally I use individual heddle loops), and I want to see if I can keep a consistent width, that it was plenty enough to contend with at one time. 

I actually am wondering if I can pick my even weave dbl wv by hand, like we do for warp face dbl wv??? until I can get the hang of all of the threading/heddles/shafts.


Anyway, I have 2 threads in each heddle, a pink and a purple, for both sheds, just like for warp face dbl wv. I decided to leave them that way and use a dble strand of weft, one pink one purple, basket weave at this point, and see how close I could get to a balanced fabric. My twining was originally one thread at a time…but I re-twined it using the pairs so that I could just leave the sheds like they were wound on the warp board, instead of repicking and making them individuals.


The camera flash (which I can’t figure out how to shut off) made them a little big glared…but here are some pictures.

When it grows up it will be back scrubbie!

The bottom twined, and bound to the breast beam.


Twined and bound to the warp beam.


A better view.


Continuous string heddles, made with double strands of worsted cotton.


The beginning of the weaving.  Later I un-wove this and inserted a braided purple cord to make a handle for the back-scrubber.  Believe it or not I finished this 34 in. warp in one day.  It turned out very well.  I will take pictures and post tomorrow.  I think the prototype back-scrubber turned out well.  That and maybe a washcloth or two will make great gifts.

Monday, September 19, 2011

Labor day weekend...so I labored!

September 4, 2011

I seem to have thrown my back out, so backstrap weaving is out for the moment.  I did, however, warp up a backstrap loom and mount it onto my tapestry loom.

It is 48" long, 320 thread count, 7 " wide.  Now all I have to do is remember how to weave on an upright loom!  I gave myself 2 sections for warp floats, each has 20 threads...however I haven't come up with a design plan as of yet.  My back was killing me so I was pleased to get this far. 

My little portable warp board has turned out to work like a charm, even for this wide warp.  This was all wound on in one session, as I am not sure I want to try to do several small warps and mount them all on the same loom bars yet.  It must be terribly difficult to get the tension even that way...at least that's what I think.  I have a tough enough time just getting the tension correct with one warp session.  LOL

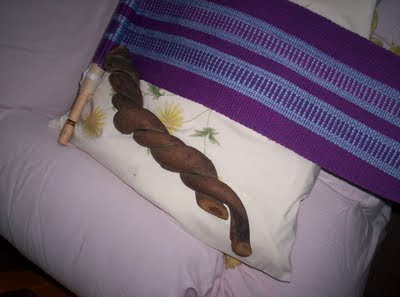
I love the colors though, I am thinking this one might be a wall piece!  I have a beautiful piece of twisted wood that Ms. Carol gave me while I was in Georgia, and as fate would have it my daughter had asked for a wall piece.  So maybe if she is a good girl, Santa will step in and make sure she gets one.

I really need to invest in a new camera.  The threads are doubled with two different shades of purple and it is really a nice effect! 


Friday, September 16, 2011

Look what I did!

September 3, 2011

As most of you know I am from an entirely female family...no boys...at all.

So when it comes to giving presents to a boy child, I find it especially difficult.  Up until now, The boy in question has been too young to notice if I gave something to his older sister, however, now at 6 yrs. old I believe he will indeed notice.

As you may re-call I recently wove a purple band with peace signs in it fro my friend Max's daughter Aye.  I have been procrastinating on sewing it up until I had at least 2 projects for the sewing machine to be drug out.  I now have the band for Alissa's pencil pouch complete and need to do my sewing.  This did leave me with the dilemma of what to gift to Aye's brother, Monster.

When Aye decided she was into peace signs, I already knew she was into purple, so it was kind of a no-brainer to weave up something for her...what in the world do you weave for a boy?????  My first thought was a belt.  Only it has to be pretty narrow to fit through the belt looms of a 6 yr. old's belt.  This meant an extremely low thread count and I wasn't at all sure I could chart up a skull that tiny.

So, at work the other night I was talking to a woman who acrylic paints.  I happen to have some paints so I decided to give it a shot...let's just say painting is not my forte'!  I did Captain America's Sheild, and believe me I have new respect for the folks who paint.  Very hard to stay in the lines with a wet medium.  So I got out my pencils, color pencils, and markers.  Did a google search on skull image's and used the results for inspiration.  

CHECK IT OUT!  I did it!  Here it is still on the board.  I added his name and 'KEEP OUT'!  For the door of his room.  Can't show the finished product because of his real name being on it...But this time I have something totally about him to give him!

One for Aunt Marsha!


And he LOVES it!  I did give him the Captain America shield painting, but thank goodness it went to a 6 yr. old.  I won't be gifting any more paintings for quite a while. lol

Wednesday, September 14, 2011

Pencil bag for Alissa!

August 29, 2011

My current project.  Just kind of wingin' it.  

My friend Alissa, a full time college student, full time Home Depot employee and mother, asked for a pencil pouch.  Of course we all know I don't need a reason to weave, but it is soooooo nice to have one.  LOL

So I had her pick the colors from my stash that she wanted and I must say that I love them together.  The warp is 36" and 146 warps wide.  Used #10, so it is only about 2 1/2" wide.  

Practicing on the different techniques, the silly scroll in 'warp floats galore' took me most of the day...I should have done a few more piece's with the technique a few months ago.  It's like learning it all over again.

This is what I have so far.  No particular design factors in mind, I just want it to be unusual and interesting for her to look at.  Maybe even to catch the eyes of some of her fellow student friends, and my old buddies at Home Depot.

At this point I think it will be my usual envelope pouch, just long and narrow instead of the more square version.  I will definitely be getting out the sewing machine soon.  I also need to put together the little purple peace sign bag for my friend Aye!


Monday, September 12, 2011

Completed project!

August 25, 2011

I completed my copper/espresso/bridal white current project.  It is 4 3/8 in. wide, 17 1/2 in. woven web and 19 1/2 in. with fringe.  It is also, a pleasant surprise, reversible.  It is done on the backstrap, in simple warp float technique.  Although I wish I had had enough of this yarn to make it larger, I think it will make a lovely holiday gift as a table topper.

I need a new camera, or to at least go outside to take the pictures.  These just don't do it justice.  I call this side the front.


This is the backside.


I love the spots on the back!


I really hope that you can see the copper peeking through!  It is a mystery yarn, maybe even silk.  It looks hand spun and just shimmers like crazy in the sunshine.  I will try to get a better picture!


Friday, September 9, 2011

New warp!

August 22, 2011

Hated the warp I was working on...I don't know what makes me do these things.  I tried the #10 for the double weave part of that warp to see if I could make the ridge where the dbl wv meets the plain weave less noticeable.  And it did.  But I kept making mistakes because it is so hard to see the fell line with #10 in dbl wv...at least for me it is.  

So I cut it off and re-warped the pipe loom.  This time I didn't wrap around it with the warp already on backstrap bars.  I just figure 8 warped it onto the warp board and when it came time to put in the backstrap loom bars I used the copper instead.  Thus a warp that is only 22 in. long.  No rotating, no rolling it forward to make it easier to reach the top portion of the warp.  Again, what the heck was I thinking?

Anyway, the color challenge group I participate in on Facebook's colors are brown and yellow.  So, since I needed to get accustomed to warping this loom, and I didn't have much brown and yellow....a short warp was in order.  

Beautiful warp!  I used the double stranding that I love so much and added in some copper to the brown.  Now to decide on a motif...hmmmmm...Oh wow look at this one!  It looks like an owl, browns are perfect for an owl...only not so much once woven.  LOL

I believe this pattern is out of the Hellen Bress book, Inkle Weaving.  But to me he now looks more like an alien than an owl.  

I do wish that my camera, as well as this design would do these browns justice.  The subtle patterning from the double stranding just isn't to be appreciated in my pictures like it is in person.  

Trying to decide if I want to un-weave it.  It's only intended to be a book mark to begin with, so I may keep him as he is.  Maybe.


Wednesday, September 7, 2011

New set up with a copper pipe loom.

August 27, 2011

I am not sure if it is because of the new digs (home I am living in), the move itself or if I am simply having another creative slump...but nothing seems to work of late.  It has been very frustrating.

I do have to admit though, that I have a few more things going on in my life right now also.  These may be a bit of a distraction.  I am of course working, even if it is only a few hrs. a week.  I have also been re-acquainting myself with old friends now that I am back at home in FL. (a social life, go figure).  I have also been walking and doing some bike riding, I am determined not to be housebound and if it means I loose a few pounds also, then all the better.  But, as usual, I digress.

I still haven't found a satisfactory place to hook up the backstrap.  Even when the dresser worked, I couldn't sit in my recliner as I am accustomed to.  That chair and I have a system for tensioning, and for where I place my tools between passes, while using that system.  The set up at the dresser meant using a different chair, and being kind of set in my ways with it, I can't seem to get comfortable with it.  Backstrap weaving never came particularly easily to me and once I got a system down, after months and months of effort, I really struggled here with a new set up.

So I took out the pine needle basket weaving supplies, sort of.  I couldn't find any pine needles on the ground!  Can you believe that?  I am living in beautiful Oak hammock, instead of the pine forest as I have for much of my life.  So I called my friend Buzzy, who lives in the forest (and has tools, he made my tapestry loom years ago) and off we went.  Still no decent needles on the ground, so he cut me some limbs.  So for now the needles are outside drying.

I also cut some new-growth palm and tried spitting it and coiling with it.  Don't really care for the whitish color, or the lack of pine smell.  I also like that the pine needles are smaller (smaller in size here than in GA) and compact for space in my work area.   Palm fronds are larger by far.  

So, now I needed some centers for starting the baskets for when everything is dried and ready.  We sliced two tree limbs, one Pine and the other I believe is Aspen, and Buzzy drilled wholes around them so I now have them curing in a window sill.  For now everything is curing, so no pine needle basket weaving.

Back to the loom...

Part of the problem I had with the pipe loom was the fact that my threaded rods in the sides (for tensioning) were waaaayyyyyyyy too long.  My spare set had nuts welded to one end (that is another story entirely) and that end would not fit inside the pipe, and of course they were too long also.

Got my roommate to dig out his hack saw and help me cut them to size, which also eliminated the nuts.  Wala!  New threaded rods, no cost to me.  

Then I took the backstrap loom, with a warp for double weft double weave already on it, and wrapped it around the pipe loom frame.  In this case the warp was a little on the short side so I had to improvise (the next one will be the appropriate length and I will simply tie the warp bars to each other on the back) on how I mounted it to the frame.  Lots of lashing cords.  Basically it is alot like using a Navajo loom, but nicer in that it has tension rods in the sides.

Then I tried to lean it against my weaving table, and it kept pushing the little table away from me...hmmmm...Brainstorming.....hmmmm....I placed 2 large C clamps on the far side of the table, and laid the far end of the loom on TOP of the clamps.  This gave me a slight slant to the loom, I like that.  I pulled the table closer to me and put my feet inside of it, as I always have to keep it from moving around while weaving, pulled it up to my lap and WOW...I think this is gonna work.

I did have to slide the loom to one side of the table so that I could c clamp one side of it to keep it from moving left to right, but OH WOW, I now have a place on the right hand side to lay my tools!  This means I don't always need the ugly yellow tool box right beside me either!  This is great, because the tool box is large and bulky, taking up valuable real estate in my room.  

I may even be able to mount a clip on lamp to the table.  Heaven.  Now I only have to push back the little table when I want to stand up, and with two little spoiled dogs, one does need to stand up fairly often.  LOL

Now to try a little bit of weaving and see if it works as well as I think it will...And of course I did take some pictures for you viewing pleasure.


Here you get to see the angle.  Notice the red walls in my room.  Not my choice, remember that I rent the space and it used to be a teenager's room.  LOL

 
Front view.


Here I am sitting in the recliner, feet in the middle of the folding table and some weaving goin' on!

When I pull the table up nice and close the weaving itself is in just about the same spot it would be in if I were strapped into the backstrap loom.  I am so happy!  I even have a place to lay a mirror on the table so I can keeping checking the back for mistakes in the double weave portion.  Remember the center is dbl wv that is reversible...solid brown on the back side not the same variegated you see here on the top center.

So friends, I am going to finish this piece after all.  Still a bit of a struggle because the dbl wv portion is #10 cotton crochet thread.  I just don't like #10 for dbl wv, too hard on the eyes.  Too tedious and too much counting for too little reward in my humble opinion.  

I am also thinking that if I want to, I should, should mind you, be able to unwrap the warp, take the pipes apart, put all of it into a backpack and make it a portable situation for when I want to take it with me on my bicycle.  I am determined to independent and portable, and under my own steam for transportation.  If the Navajo Indians can do it so can I!

Monday, September 5, 2011

New project, Double weft double weave.

August 16, Tuesday

This piece is a bit of an experiment.  I am using #3 mercerized cotton for the outside plain weave portion, and #10 for the center double weave area.  I want to see if this will make the ledge between where the two meet less acute.  

This means that I am doing double wv in the dreaded fine yarn... :-{ which we all know isn't my favorite thing.  But I happen to have alot of #10 and I need to just get over it.  There is a sort of variegated #10 on one side that I have been hording since Christmas.  I am hoping to get an interesting effect.

Here is the 30 in. warp laid out on my bed being secured to the warp beams.


Just a close up of the colors.


This is the side I am looking at as I weave.


Here is the backside.

I haven't really decided if I want to do pick up designs yet...maybe I will just let the variegated yarn speak for itself...

Friday, September 2, 2011

Pink pebbles!

Monday August 15, 2011

Finished the pink pebble piece some time last week.  Not happy with it at all.  I still find 'pebble weave' fiddly and difficult to setup, and I haven't put alot of effort into a design motif because I dislike having to reach through to the bottom shed to do the lifts.  This technique does give a double sided/reversible fabric, but I don't have much need of double fabric in the first place, and if I do I prefer double weave because of the solid background.

I decided to finish it out with just plain stripes, it is off center and off balance at both ends.  It seems that when I don't enjoy something it doesn't turn out as well as I would like.  Surprise, surprise...lol.

Pink pebbles.


Notice how where I doubled the weft in the stripes, it changed the weave considerably, but not the width of the fabric.


I even got hour glassing on the pebble design...different weaves, different results in the same piece.


Here you can really see the hr. glassing.  The piece is actually a consistent width all the way from end to end.