Did you know?

A "Pandula" is a flower which blooms only in one's imagination.

Pages

Saturday, November 20, 2010

New collection!

This is the first time I have been honored in TWO collections at the same time.  Thanks so much to Avrilpam and Sagescupboard!  Just click on these ladies names and you can go have a look see! 

I am so honored!


Friday, November 19, 2010

My Secret Santa gift!

I belong to a guild that my friend KraftyMax started called Beautiful Art and Artwork!  It is out of Artfire and we also have a blog.  In an effort to participate and keep this new guild active she has come up with some great promo's. 

First off we are having a contest with the "Holiday" theme.  I made a Christmas Bow with bells and handmade inkle straps done in Damask!  The contest isn't over yet but here is a picture of my entry.  I have posted these here before in case your are thinking you have seen these.  lol


This is not what I sent out fro my secret Santa, but I can't show you those until I know that the person has received it...wouldn't want to spoil the surprise.

Anyway I digress (yet again).  I received my secret Santa gift and I would like to share it with all of you.

It is from a very talented photographer named Erin Norman Photography.  It is a beautiful 5 x 7 picture of a huge tree in full bloom!  I am not sure what kind of tree, but I LOVE it.  It is done with a sort of sephia tone to the photo and I love these colors! 

I can't Thank them enough for this wonderful surprise.  It certainly brightened my day and will be beautiful hanging on the wall of my bedroom.

As you can see I certainly am no photographer.  It is on a foam board and has a wonderful protective, though shiny, top coat.  I simply could not get a photo without the glare.  I only wish that these photo's could do it justice.

I think it might be a Cherry tree in bloom.  Either way it is lovely.

You can find information about this photgrapher on our blog site for Beautiful Art and Artwork if you would like to view their work


Be sure to go and have a look, click, follow or buy!  Tis the season!

Thursday, November 18, 2010

Friday is a 'Play (think weave) day'!

I am looking forward to Friday.  I will be going to my friend Dana's house for a 'play day'.  Actually, she purchased my Kromski Harp Rigid Heddle a couple of months ago, (that is how I purchased my Mini Wave), and I committed to teaching her how to operate it.

So we have a date.  I am going to go to her house and we are going to weave.  I even got to pick out the menu.  We live in farm country, and she has some vine ripe home canned tomatoes.  Sooooooo, I asked for homemade tomato soup and grill cheese sandwiches.  Simple, but fresh food and good company to do my favorite thing.  Weave.  I will also have good company.  Can't wait.

It seems that I am indeed starting to have some sort of life, all be it a small one, here in Moultrie, GA.  Guess I just have to make the best of  the situation and it is getting easier every day. 

Wednesday, November 17, 2010

Another practice band on the Mini Wave!

This one is green on green.  After threading up the loom, I discovered I really didn't like these two colors together.  No 'pop', no 'pizaz' and certainly not enough contrast. :-{

But being a trooper and all I persevered and then discovered, low and behold I also have tension problems with this warp.  Drat!  Still I plugged along.  I found a couple of new PDF articles on inkle weaving with some nice pictures and applied a couple of their designs.  

My favorite is the little 'man' figure.  SOooooo kewl, if I do say so myself.   I had to complete this warp is two pieces.  The first piece is complete.  I had to cut it off so that I could retie onto the the front beam to correct the ridiculous tension problems I was having.  It's not written in concrete but I will probably make an envelope bag out of it.  For not I just want to look at it while I complete the rest of the warp.  

Here are a few pictures.  Let me know what you think.


Tuesday, November 16, 2010

One weft double weave!

I finally succeeded in one weft double weave!  I got all of my information for the very informative blog on Backstrap weaving by Laverne Waddington.

I discovered her on Weavolution and Weavezine.  Then I stumbled on her information again on Ravelry.  All three of these are full of great information on weaving and fiber arts in general.  The really great thing is the information is free for the offering.  

One weft double weave allows the weaver to have one color on one side and another on the back side.  It also provides for the weaver to have design on the front that is the reverse color on the back.  I am still trying to get the basic weave down so mine has no design...yet.  It produces a very thick and sturdy band.  I think for myself I will use finer threads next time and produce a finer band.  I can see where this would be great for dog collars, leashes, mug rugs, hot pads and even belts.  It is a labor intensive weave, which in my case made for time consuming as well.  We all know though, that weaving in general is not a 'fast' form of art.  This weave actually forms kind of a tube.

I took some pictures for you.  I did break a warp thread with all of the fraying going on from all of the manipulations while weaving.  It requires very minute changes in the weave tension that I am absolutely sure would be easier with a backstrap loom.  I can see another session with the backstrap in my future.  

Keep an eye peeled.  More to come soon.


Monday, November 15, 2010

Currently on the loom!

So I got another long warp on.  This one is 9 1/2 ft. long.  It is done in celery green and Christmas green striped background for the pick up technique.  It is done in 100% mercerized cotton #10, very fine.  It measures 2 1/4 inches wide. This one is 72 threads across and I have a 60 thread design area.   Now I just have to do decide what I want to do for the design work.  I am finding that I am not overly fond of these greens.  Since I have no job I am trying to make the best use of what I have on hand. I started, as you can see, to do the 3d effect, but I find that the colors are not vivid enough to give me the pop that I want.  Might turn out that I simply 'wing it' again.  Some people call them samplers.

I find that when people use the term 'sampler', it somehow takes on a negative connotation.   I like it though.  It is like eye candy to me.  You have to keep looking at it to fully see all that the designs have to offer.  Each viewing brings you something new, sort of a surprise.  I like that. 

I also took the pictures in such a way that you could see how I have myself set up!  The loom sits on a teak or maybe mahogany piano stool that I got off e-bay a few years back.  Some silly person had sprayed it silver, so I stripped it and used it to sit on in front of my loom.  That loom is now history, but it is the freestanding one that I built myself.  Anyway, I have a wooden tray with burn accents on it clamped to the stool.  Just a spin and I can raise or lower my loom.  Works beautifully!  If you look closely you can see that most of the accessories are hand made by me.  My swords, shuttles and such.  

So far I have not been able to max out the little Gilmore Mini Wave.  I am still getting used to working with a warp board.  Eventually I want to do a 4 inch wide piece. 


Friday, November 12, 2010

New warp face technique!

I finally got the inlay technique to work!  Sort of anyway.  It isn't my best work, but it is indeed my best attempt at inlay yet.  Here are some pictures.  Hopefully I will get better as I go along.  

In the other technique I have been using, pick up, you do just what the name implies.  You 'pick up' the thread so that it floats over the top of the next shed's weave.  In inlay you drop the thread and replace it with the inlay thread of your choice to create design work.  Soooooo, not only is warpface backwards, or better to say the reverse, of tapestry, this technique is even the reverse of what I have been doing in warpface up to this point.

Actually when I warped up I had decided to try a double weave technique.  That means that one side of the band would be one color and the other side another color entirely.  If you were to do the pick ups for a design, they would show opposite on the back.  For instance if the band is black one one side and white on the other, the design on the black side would be white, and on the other side, the white side, the design would be black.  

But as I warped my fingers took control of the mind and I actually warped for a striped background.  The very technique I have been using so much of late.  So instead of throwing a 7ft. warp in the trash I decided just to go with it.  Then out of sheer boredom from doing so much plain weave, I decided to try inlay again.  

So this is just another practice piece.


Thursday, November 11, 2010

My corner of the world!

Went to my workshops in the housing last wk. on  Tuesday and Wednesday.  Unfortunately I haven't been able to wrangle any participants yet.  I did however, manage to hand the information over to a few people that I saw milling about.  I also met one of the other women that gives workshops in the same two housing developments and she told me that she had been talking me up to her people.  Cross your fingers for me.

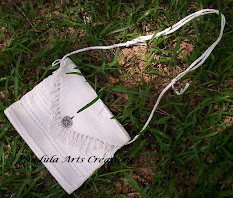
Also Carol and I set up our little booth at 'Stuff & Such'.  It turned out I had 21 items ready for sale.  It was quite time consuming to set up.  I spent the better part of Friday making tags, filling them out, attaching them to the product and then inventorying.  Then we went and set it all up.  I did indeed take pictures, but I only remembered to take my ph., so I used the camera in it and the pictures were un-usable.  So again wish me luck!  Maybe some things will sell there.

I have a 'playdate' with my friend Dana on November 19th.  I will be spending the day at her house teaching her how to use the Rigid Heddle loom that she bought from me.  She even let me pick the lunch menu.  I am very much looking forward to the visit/class/playdate.

Our workshop together last week ended up to be very enlightening, I hope for both of us.  It turns out that the particular technique that I had her using for her current project was taking all of the 'fun' out of it for her.  It was forcing her to think too much, instead of it just happening.  See, even though I NEVER use a pattern (except when I knit socks) and love to just see what happens with a certain technique or colors, she on the other hand prefers a vision of what the end result will be.  A Pattern, if you will, or at the very least a plan.  She is very willing to adjust the plan, if necessary, even to rethink it, but she likes the more structured way of creating.  What I find confining, she finds liberating.  

The very best thing that came out of that discussion, was that she now realizes how to let me know when what she is getting from the class is not what she really wants from it.  She had to find a way to express this to me, and I had to find a way to turn that into something positive.  

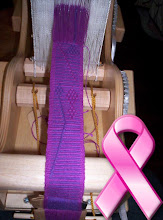
The technique she was using is called hatching, and it can be used in many ways.  It can involve one solitary color, or 3, which is what I had her using.  It can make small statements, or you can expand on it to achieve an entirely different effect.  She told me that she loved doing the first piece, and looked forward to working on it each day.  This piece though was taxing her and she was not looking forward to working on this one, but dreading it at times.  She needed a plan.  She said she just kept waiting for it to 'speak' to her, and it just didn't.  We did indeed discuss expanding on the technique and what she could achieve with it.  This gave her what she needed to think AHEAD, and to envision what she might want to achieve with the piece.

For me I think the most valuable lesson for her, was that she could discuss these things, limitations if you will, and we could work together to figure out what EXACTLY would work for her.  That, in my humble opinion, is what makes art ART.  Just because something works for me doesn't mean that it will work for everyone else.  I think she now knows that I am there to give her guidance, encouragement and technicalities. That I can in no way be disappointed by her art and that we have infinite flexibility.  The rest, for instance the plan, is hers entirely.  We took something iffy at best, negative at worst, and turned it into something enlightening and educational.  I am pretty sure this is what makes for a good teacher, or mentor for lack of a better word.

It was a great class and I could not be more proud for the both of us. Art should not be frustrating, or dreadful, but creative, fun, and anything else that brings pleasure to the artist.


Wednesday, November 10, 2010

I made it into another Collection!!!

Go take a look!  Don't forget to post a 'like', visit the artist's sites and leave a comment!

Tuesday, November 9, 2010

My Pandula Band!

I finished it! and it is 7 1/2 ft long before the fringe!  Now two Pandula's are alike and I love this.  It is for sale on my Artfire site for $28.00,  It would be a great textile trim, dog leash, or even a sash belt.  

Guess its time to re-warp the loom.

I wish I had a better camera, these pictures don't begin to do this piece justice.  The cotton  has a beautiful sheen and the colors just 'pop'!


Monday, November 8, 2010

Update!

I finally got the courage to sit down at my sewing machine.  Thanks to my friend Dana.  She sat down with me, after making up the prototype envelope bag, and helped me get the tension correct on my sewing machine.  I needed to reacquaint myself with the machine it had been so long since I used one.   

So I made up some little 'envelope' bags.  They are so cute I can hardly believe I am the one who made them!  I even put them for sale in the consignment booth.  Here are a few pictures.

I kept these for myself!


These are for sale in my consignment booth.


Now that they have a purpose I can consider their structure when developing the designs.

Friday, November 5, 2010

Beautiful Art and Artwork Guild!

I belong to the Beautiful Art and Artwork Guild!  If you are not a member already you should go and check it out.  It is founded by my friend KraftyMax and she is working very hard to round up participants.

Right now we are having a contest with a Christmas Theme.  Today, Friday the 5th is the deadline for entries.  So I thought I would show some pictures of what I have entered.


The red and green bands are handwoven tone on tone after a damask effect.  They are 100% mercerized cotton crochet thread #10.  The bells and silver ribbon were purchased commercially.  I think this piece would serve nicely as a door bell, a ribbon for a special present or even for a tree topper.  The bands have diamonds alternating in the pick up technique from end to end.  They could be used for straps of any kind at your discretion after the holidays! Simple, effective and very holiday oriented! 


Thursday, November 4, 2010

Currently on the loom!

I actually got a long warp on the Mini Wave again!  I got about 9 feet.  I thought I would give you a sneak peak!  I am calling it a 'The Pandula band'!  
I am going to use the floral pattern in the middle all the way through it.  Each flower is reversed from the previous in color, and so far no two are alike.  It is a little over 2 feet long at this point.  All of the blues have sheen, and it is done completely in 100% mercerized cotton crochet thread #10.

I am in a quandary though...after seeing my new inkle pouch I am not sure that I want to make one very long band, or if I need to make several shorter ones that would be the proper length for a pouch?  I weave the end of the weft into the piece with a tapestry needle at the end of the piece, so it doesn't unravel when taken off the loom.  If it is one long continuous piece, I will have to cut it to make the pouch's and then I would be left with a raw end.  

Decisions, decisions.

As usual all feed back and suggestions are welcome.


Wednesday, November 3, 2010

My first 'hand bag' made from a warp face band!

My new friend from weave workshop has saved me from myself.  I destroyed a small inkle band trying to make a prototype 'pouch'.  I am so not a seamstress.  So I asked her, (her education is in textiles) if she would take a look and see what she thought. 

I gave her a very vague idea of what I thought I wanted and asked her to give it a shot with my green hemp and white cotton band.  It was one of the first ones and it also happened to be the longest.  I didn't realize, until it was too late, that the mystery yarn from the Art Center was green hemp.   Thus it is a bit scratchy, but should wear like iron.  It wasn't my favorite and I knew that if we destroyed it I wouldn't be a bit upset.

She is a miracle worker.  She achieved EXACTLY  what I wanted and brought it to me today.  I love, love, love this little bag.  I haven't thought of a name for them yet.  Most of them will be small, maybe a bit on the long side.  Some will even be made into cell phone pouches.

I still have to find a button or something along those lines for a closure, haven't decided if I want to put a strap on it or not.  It is a good size for a make-up bag and as such would not even need a strap. 

But I really just wanted to give you guys a preview!  CHECK IT OUT!!!!


Tuesday, November 2, 2010

Weaving workshop!


Well my friend who comes to my weaving workshop not only completed her 'tapestry', but turned into a fully lined and very functional tote bag!  She agreed to let me post pictures of the bag itself, but none of her of course.  

We started her out with what we had on hand, which was acrylic.  I find that since it has more stretch and give that it is easier for a new weaver to keep their sides more even,  that being the bane of all weavers. 

Of course now she has started her second piece and we are moving on to the finer yarns and a larger piece.  Predominantly cotton.  She is also using some chenille in the new one.  We are striving for some different techniques in this piece! In the first one we practiced the warping and some horizontal stripes along with soumak details. Her goal is to make a pillow cover this time, as she prefers to do her weaving sitting on the floor.  (I only wish my old bones would LET me sit on the floor. LOL

All in all I think I turned out very well.  I couldn't  turn one of my weaving's into a handbag until just recently.  Let alone line one.

I am so proud of her progress.  I think it reflects just a little on the instructor that she is doing so well.  It is definitely a win win.

Take a look for yourself.


Monday, November 1, 2010

One weft double weave!

FINALLY!  I figured out how to do one weft double weave! 

It requires a special warping and multiple passes per row of weave.  If you get it right it will let you have a solid background for your designs.  It also is one color on one side and the other color on the flip side.  It is also a very heavy weave.  On the thick side, unless you use fine thread/yarn.  I went for something heavier for this one.  The first one I did a few months ago is very small and somewhat thinner.  This is an extremely laborious technique, very time consuming.  It took me HOURS to do these pieces, I figure around 6 hrs.  I also found that the tensioning needs to be flexible and I had to do alot of fiddling with it on the loom.  Very easily achieved if the loom is attached to your body.  This definitely works better on a backstrap.  Guess I am in for another shot at backstrap weaving.  LOL

As usual I got my information from Laverne Waddington's Backstrap blog.  She is also found on Weavezine and Weavolution.  Both excellent sites for weaving information.  We are both also on Ravelry and I find great information there also.  Ravelry has great info for knit and crochet kind of fiber art also. 

So here are my pictures.  Keep watching for one I do on the actual backstrap with a design....eventually.


Another warp band!

Well its confirmed!  I am no seamstress!  I tried to make little purses/make-up bag/cell phone pouch out of my warp face bands today.  What a disaster.  These weavings are as forgiving as my tapestries!  Every stitch pulls and snags!  I even tried the sewing machine, and I HATE sewing.  I destroyed one small piece, and learned alot.  

I also completed another band.

I have done waaayyyyyyy too much research and still can't get the hang of how to get rid of the stripe background.  No successes there either. And, now I can't even figure out how to sew the bands I have already done into something useful.  FRUSTRATION, FRUSTRATION, FRUSTRATION!  They are too short for belts, too long for bracelets, too narrow for dresser scarves...they might be good for the top of a toilet tank.  LOL  How many people will use it for that though.  Most of the color schemes wouldn't work for that either. 

So I warped up the Mini with a plain red band.  Just for some mindless weaving.  I am indeed getting better at the edges, and consistency.  Yeah!  Tried to do some brocade/inlay, another dismal failure. 

Still, I think you should see the new band.  So here it is.  Please remember I am new to this.  The warp was perfect this time.  No saggy spots, not much waste.  YEAH!  I used mini blind slats this time and the last, I also used ONLY mercerized cotton.  Much easier. 

I will be glad when I can weave something without as many angles!  

Here are the pics!  Feedback welcome.